Table of contents
- What is Node-RED
- Why we are using Node-RED (or an alternative)
- Node-RED to the rescue
- Configuration components
- Running an instance
- Creating your first flow
- Spicing things up
- JSON
- Node-RED persistent config
- Node-RED and Docker
- Node-RED and CI
- Conclusion
What is Node-RED
Node-RED is a programming tool for wiring together hardware devices, APIs and online services in new and interesting ways.” – from docs https://nodered.org/
And yes, that’s all true. But we’re not using Node-RED for those things. There are two use cases for which we use Node-RED, but before we go into those, we’ll take a quick look at some other Node-RED features.
Some great pros:
- Node-RED is built on Node.js, taking full advantage of its event-driven, non-blocking model. This makes it ideal to run at the edge of the network on low-cost hardware such as the Raspberry Pi as well as in the cloud. (from docs)
- Node-RED comes with a web based graphical user interface, where you can manage your API flows with drag and drop functionality.
- Because Node-RED is built on Node.js you can just run it locally on a lot of systems (Windows, Mac OSX, Linux,…), on a lot of devices and in the cloud.
The graphical user interface lets you create your endpoints and flows in an easy way. Just drag and drop your components in your flowchart and connect them by drawing a line between them. Double clicking each component will open the detail screen where you can set some variables for that component. When your flows are ready, there is an import and an export function available for storing and sharing your configs.
Why we are using Node-RED (or an alternative)
Node-RED and Development
Coming from a frontend dev background, I can confirm that nothing is more frustrating than running backends, or at least part of the backend, locally, before you can start coding and testing. Yes, Docker and Docker Compose are helping a lot but still… In some cases, backend development, for a specific feature, is planned for the same sprint as the frontend development. So even running a backend locally, will not help you. Mocking can be an option. You can start mocking the data inside the communication layer or mocking an external backend with test data.
In an ideal world, teams should do some analysis of the specifications coming from business and their analysts. Based on those specification, developers can start estimating tasks (or stories and epics), and think about the architecture and design. At this point, technical specifications could already get written down, such as model designs and API contracts. It’s almost impossible to do a good job in the frontend if those things are not available, or at least specified.
Why do you want good test data? If you know the characteristics, it’s easier to do some layout stuff. You would think that mockups and designs would be accurate, but most of the time they aren’t or they are not inline with the data.
So what about mocking? Yes, you can mock stuff yourself and maybe skip the communication layer. Or you can mock the communication part in the communication layer by means of interceptors for example. But at some point in time, you’ll need an API and test data that is close to production data when it comes to live data specs. When mocking inside your components, would you include everything in your code base? Or would you exclude it, but still make it more accessible for your colleagues? Some frameworks include this kind of functionality such as MockBackend from Angular (More info here). That said, I really like and prefer external tools for mocking a backend. That way it’s separated from your app and code base, so it can easily get replaced or modified without triggering stuff in your frontend pipelines. You can even choose to run a tool on your local machine. Or on-premise and make it accessible for all your (frontend) developers.
Node-RED and Testing (CI)
Even if you have implemented your mocks inside your communication layer and it’s doing the job you expect it to do, how are you going to test your communication itself? You can use those mocks to run unit tests, but it’s harder to run integration tests that cover your communication layer as well. Using an external tool, gives you the possibility to reuse this part in your test setup. You can integrate this external mock backend in your setup and redirect your frontend calls to the mock instead of a real backend. Why you should do this, is explained in an earlier post on our tech blog. If you’re interested, you can read all about it here.
Node-RED to the rescue
In both cases, Node-RED can help us providing a real API that responds with test data.
For the test data, I prefer test data getting delivered by the business or the client, but if that is not an option, you can create your json data based on the API contracts and model designs.
Again, I’m mentioning the API contracts and model design, because often, organisations fail at this.
Let’s setup a real easy API.
Prerequisites
Before starting this tutorial, you should download or install some things:
- Make sure you have a Node.js (incl npm) environment
sudo npm install -g --unsafe-perm node-red- A running Docker daemon
docker pull nodered/node-red-docker
NOTE: To be honest, you only need one of those 2 environments. For the other part, you can just read through it and then try it in the other setup.
Configuration components
Although we are only using Node-RED for HTTP(S) (REST) and MQTT backend mocking, Node-RED provides more options. Node-RED can even be used as a real backend, using external databases for example. So before we start our setup, let’s take a quick look at some basic features.
Inputs
HTTP, TCP, UDP are probably the most straightforward and known by all of you. I guess no explanation is needed. WebSockets are also used a lot nowadays. WebSockets are an advanced technology that makes it possible to open an interactive communication channel/session for pushing messages between a client(s) and a server(s). MQTT is one of the standards for messaging for mobile devices. It is a lightweight messaging protocol for small sensors and mobile devices, optimized for high-latency or unreliable networks. Inject, catch, status and link are internal inputs. Inject provides a way of injecting a message(s) into a flow. This can be done manually or at a regular interval. Catch can be used to handle an error from another node. The normal from of that node will get terminated, but with catch you can handle and catch the error providing an alternative route. The status node is just reporting messages from other nodes and link lets the user create virtual links between flows.
Outputs
Same as above for HTTPS, TCP, UDP, WebSockets, MQTT and link but now for outputs. Debug lets you show messages in the sidebar. The debug sidebar provides a structured view of the messages it has sent, making it easier to understand their structure.
Functions
Node-RED comes with a lot of predefined function blocks.
The ones we are using most are the regular function-block itself and the json- or xml-function to parse json and xml.
Besides those, there are function blocks that lets you run calls to external platforms, delay, reroute or redefine messages, etc.
If you need more information about one of them, Node-RED show an information screen when selecting one of them.
Social
This section provides us with functionality to intercept (input/output) email- and twitters messages. I’ve personally never used one of them, but I can imagine they can come in handy.
Storage
File (input/output) is self explanatory.
The tail function, lets you add a watcher to a file.
As the docs describe, this cannot be used on Windows systems.
It’s based on the $ tail -f fileName command on Unix systems and watches for changes.
Analysis
This component lets you analyse a received message based on a sentiment score. You can read all about it here.
Advanced
Like the tail function, the watch-block watches for directory or file changes.
The feedparse can be used to monitor an RSS/atom feed for new entries.
The last one, the exec-block lets you run a system command and returns its output.
Running an instance
First things first, let’s fire up a Node-RED instance. (We are going to start with the npm package version) To start using or initiating an instance of Node-RED by using the npm repositories, just run:
$ node-red
If installed correctly, you should see the following log:
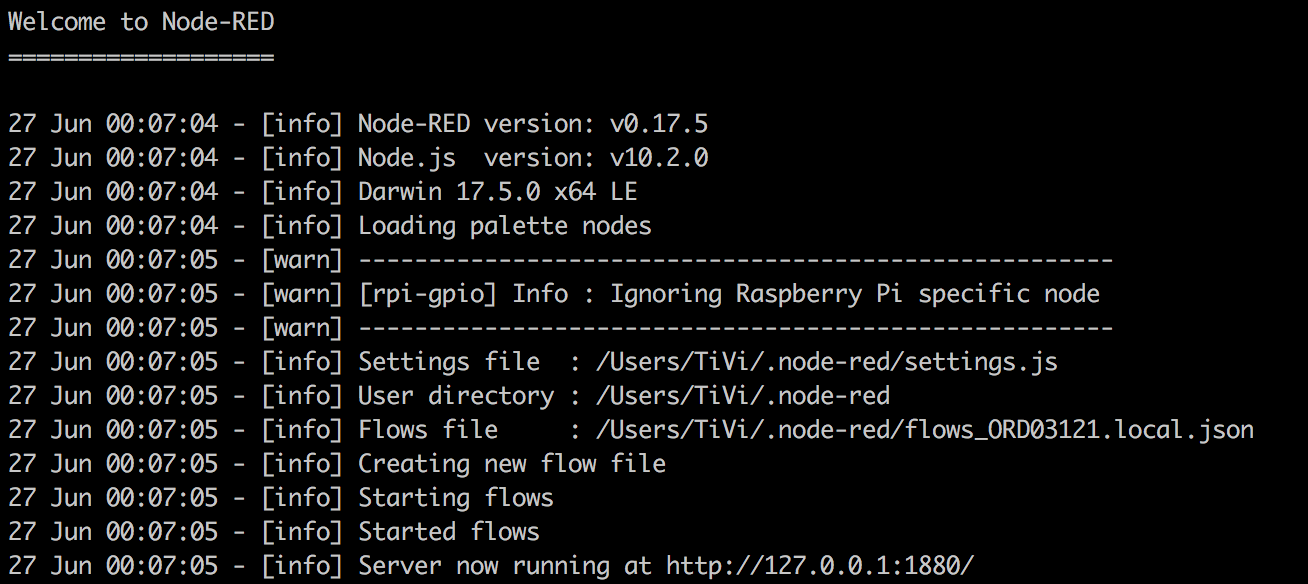
There are four interesting lines in this log. The first three of them are the settings file, the user dir and the flows file. The last line shows us where the service is available.
We’ll come back to the config later, and we are going to take a look at the User Interface based on the uri in the last line.
As mentioned before, Node-RED offers a user interface, to configure the service.
Open your browser and navigate to http://127.0.0.1:1880 (default setup config).
You’ll see all the components mentioned above on the left side of the screen. In the middle you have a tabbed structure for your flow chart(s), and on the right you have debug, info and detail windows.
On the top right of your screen, you have a settings dropdown and a menu with deploy options.
Creating your first flow
Let’s use the Node-RED user interface to create a simple flow.
In this case a simple http-input connected to a function that returns its data through an http-output.
Start by dragging the http from the input list onto the chart.
Then, drag and drop a function block from the function list and the http from the output list onto the chart.
Connect the http-input with the function block by dragging a line starting from the input node, to the function block.
Repeat this for the function-block to the output.

Of course this isn’t ready for being deployed just yet, cause we did not add any logic yet. Let’s configure our flow!
Input
Double click the http-input block.
This action will open a window on the right where you can set some properties.
- Method: GET
- URL: /data
- Name: Get all data
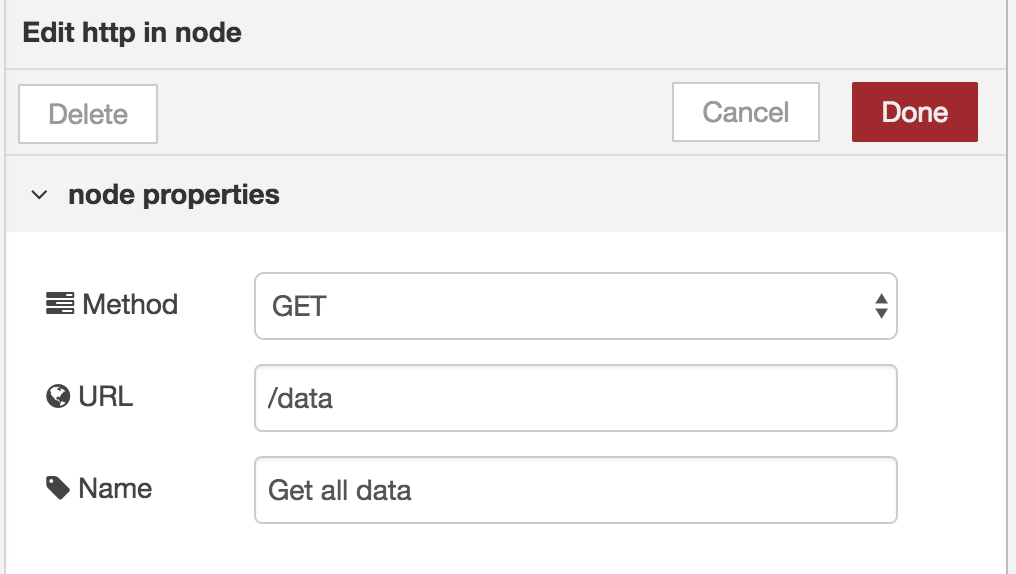
Confirm these settings by clicking ‘Done’.
Function block
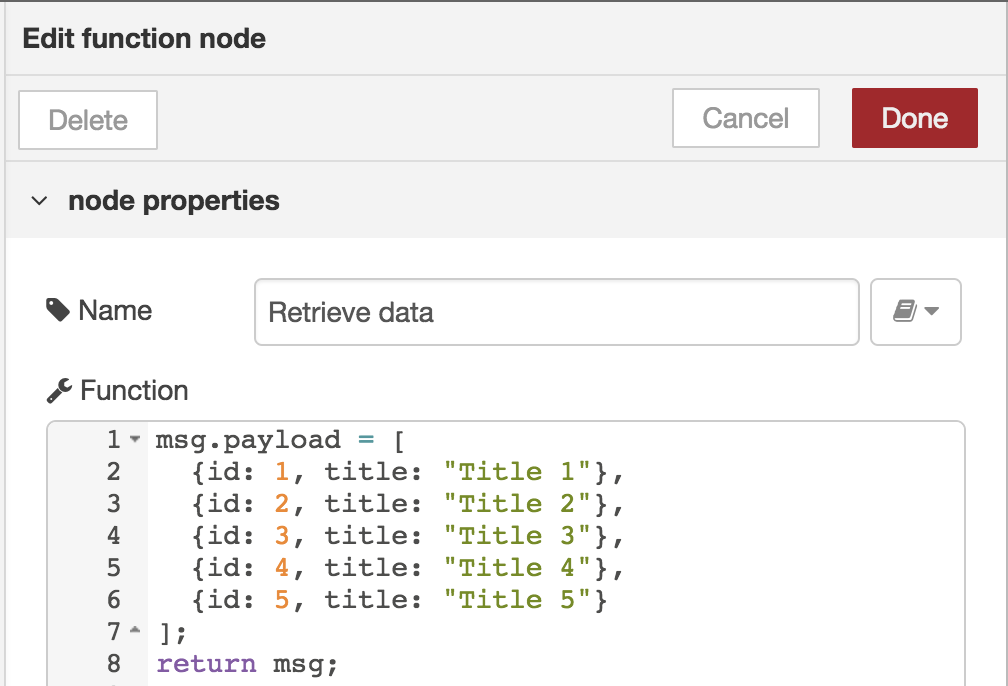
Double click the function-block.
Again, a window will open!
- Name: Retrieve data
- Function:
msg.payload = [
  {id: 1, title: "Title 1"},
  {id: 2, title: "Title 2"},
  {id: 3, title: "Title 3"},
  {id: 4, title: "Title 4"},
  {id: 5, title: "Title 5"}
];
return msg;
NOTE:
The information section on the right comes in handy while configuring the function-block
A JavaScript function block to run against the messages being received by the node. The messages are passed in as a JavaScript object called msg. By convention it will have a msg.payload property containing the body of the message.
This explains why we are setting the msg.payload property.
Again, confirm these settings by clicking ‘done’.
Output
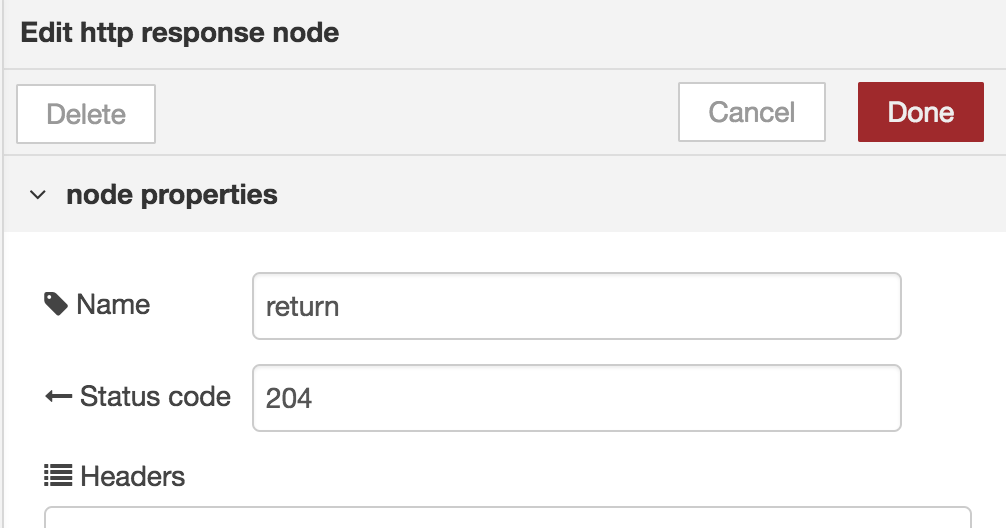
Open the config for the http-response-output block.
- Name: return all
- Status Code: 200
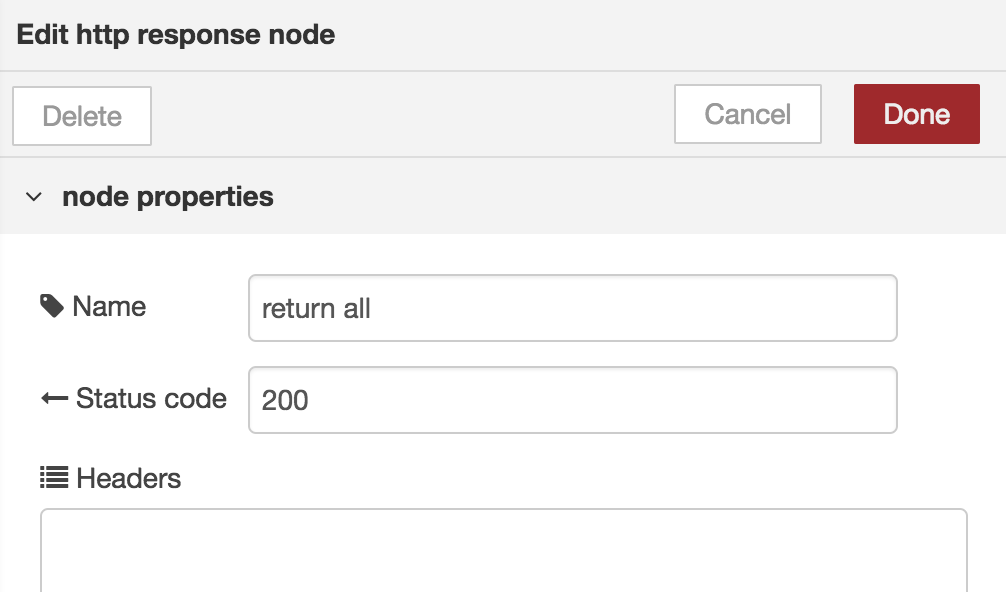
As you can see, the output lets you choose the return status code.
This can be used later if you would like to implement failed REST-calls for mocking purposes.
Confirm these settings by clicking ‘Done’.
Deploy
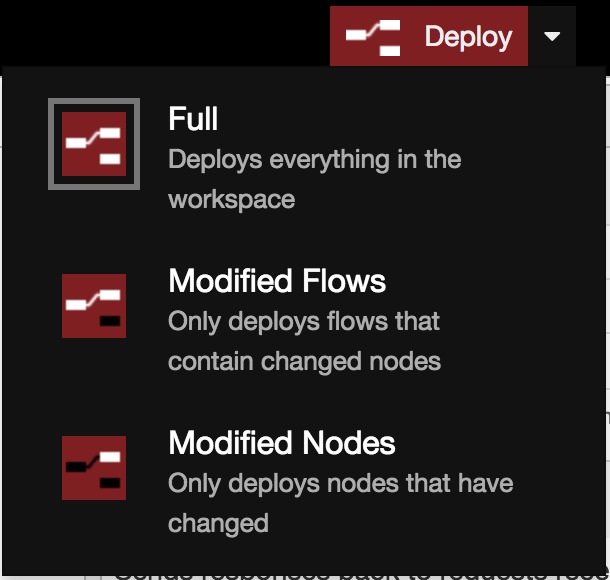
On the top right of your screen, you have the deploy-dropdown.
Clicking deploy will deploy this flow onto the running server, but you can also use the arrow to open up the menu and choose a more accurate scenario.
Since this is our first deploy and we only have one flow, we don’t have a choice.
Test setup
To test our deployment and of course our flow, just navigate to http://localhost:1880/data in your browser or use curl to GET the data:
$ curl -X GET http://localhost:1880/data

Spicing things up
Let’s try and implement a DELETE.
We would first drag and drop an http-input, a function-block and an http-response-output onto the flow chart.

The input would look like:
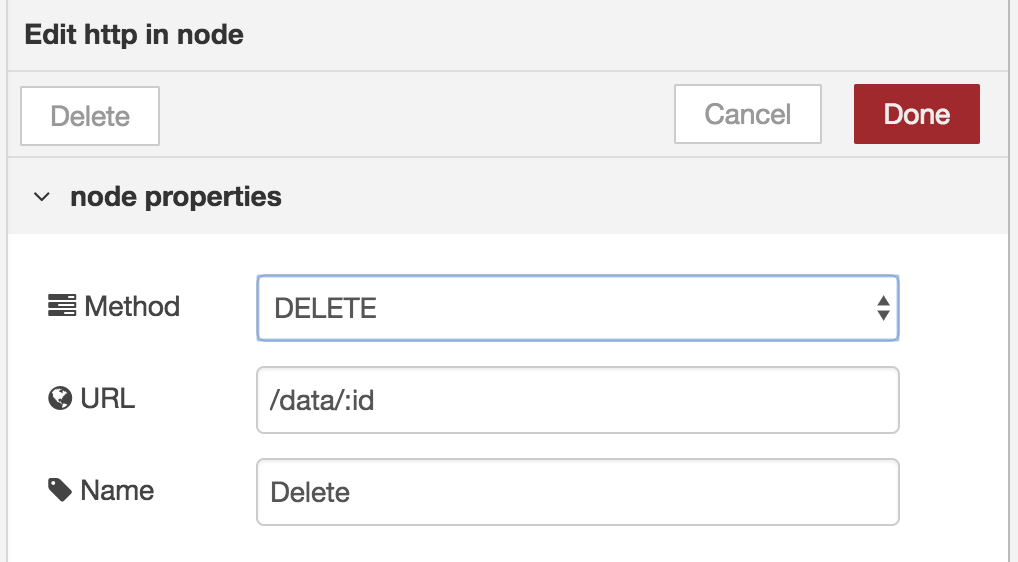
Notice the :id.
This way we tell Node-RED that this is a path parameter.
The output would look like:
But what about the function-block ? We could come up with something like:
let data = [
 {id: 1, title: "Title 1"},
 {id: 2, title: "Title 2"},
 {id: 3, title: "Title 3"},
 {id: 4, title: "Title 4"},
 {id: 5, title: "Title 5"}
];
if(msg.req.params && msg.req.params.id) { // the id
   data = data.filter((item) => {
       return item.id != msg.req.params.id;
   })
}
msg.payload = undefined;
return msg;
So we’ve filtered out an element, but that’s it. Everytime we call this function block, it will start by initialising the data array. Since we are not persisting the data, requesting all the records, will still return all the data records.
Persisting data
There is a way to connect to a database, but that is outside of the scope of this post. First, let’s show some ways of persisting data.
- Node context
- Flow context
- Global context
The node context lets the user persist variables for that node. Whenever that node gets redeployed, the context is gone. The flow context is a context shared over all nodes in that flow chart while the Global context lets you share a context over the whole app.
You can set and get a context variable with the getters and setters from the api. For a flow context this will look like:
let data = flow.get('data');
// do stuff
flow.set('data', data);
Initialising data
Now that we know how we can store data, we need to find a way to initialise the data.
We could for example launch a call to trigger a function that would store data in the flow context.
We could build this by using an http-input, a function-block and an http-response-output.
But this doesn’t feel right.
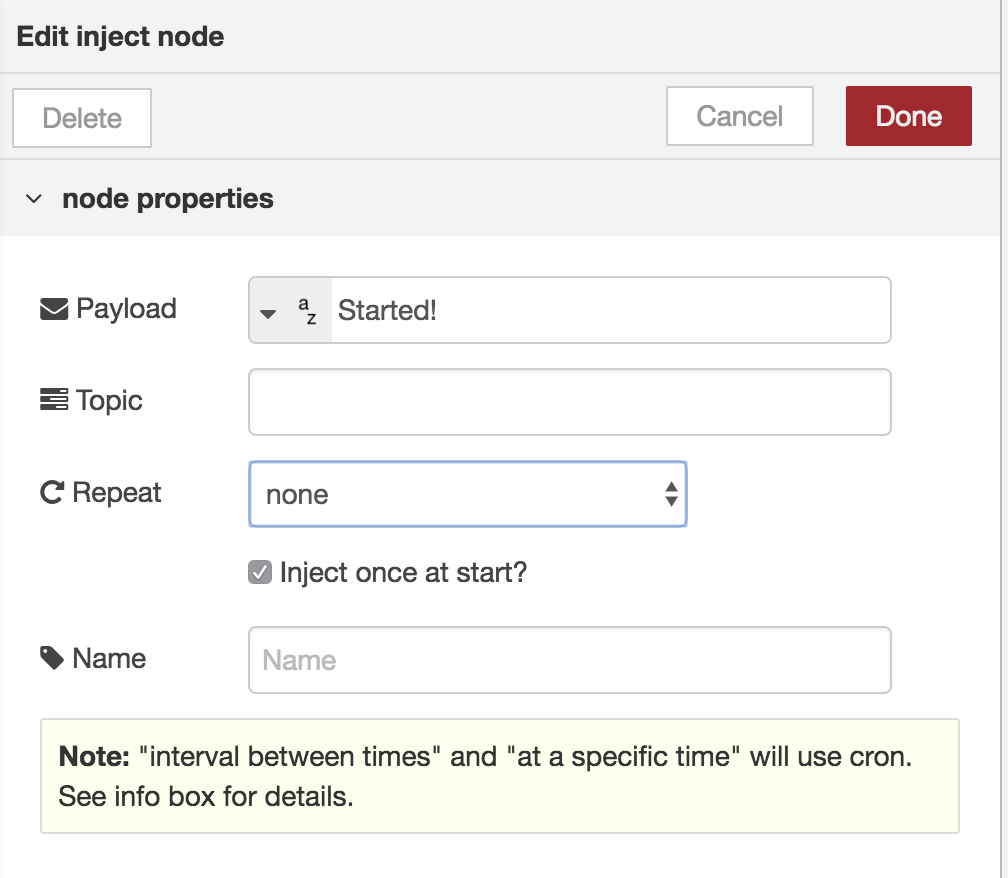
Luckily, Node-RED provides us with an inject-input.

This input will get triggered periodically, or just one time. inject-input is made for injecting messages of almost any type into the next component.
This message can be a string, a number, the current timestamp, …
We are going to use it as a trigger on startup to initialise our data into our flow.
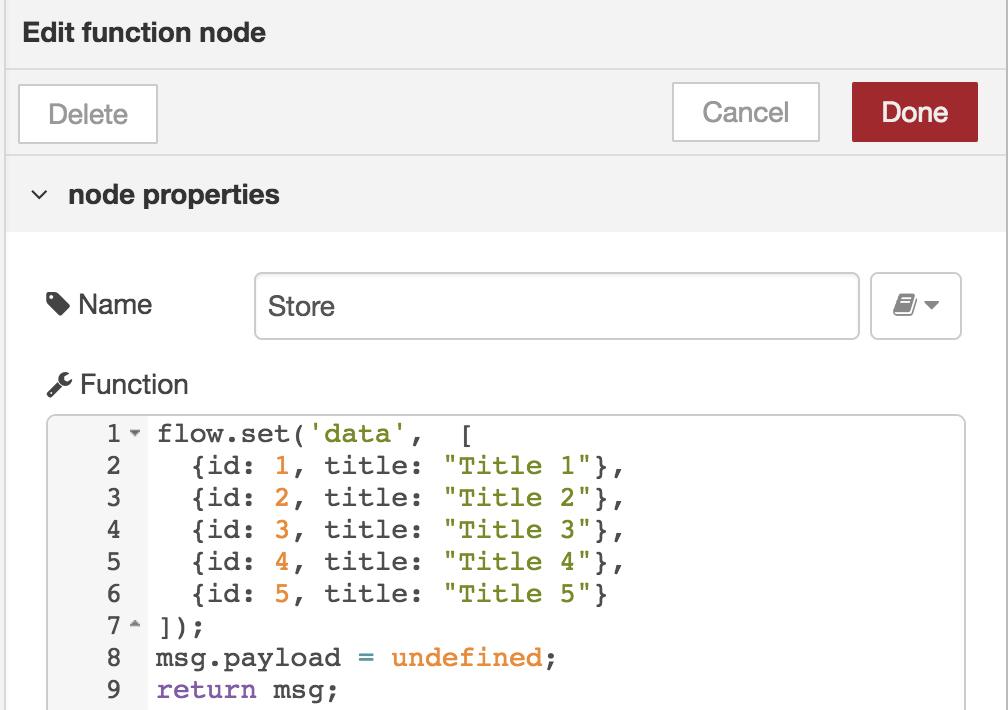
inject-input:
inject-function:
Refactoring
Now we know how we can inject and persist data in a context, let’s refactor our GET and DELETE.
And while we are at it, add a second GET so we can query one record by ‘id’.
GET
Our two http-inputs are exactly the same except for the parameter (id).
The function-block on the other hand, will have some build-in logic:
let data = flow.get('data');
if(msg.req.params && msg.req.params.id) {
    for(let itx in data) {
        if(data[itx].id == msg.req.params.id) {
            msg.payload = data[itx];
            break;
        }
    }
} else {
    msg.payload = data;
}
return msg;
We are retrieve the data from the context and storing it in a local variable.
Based on the existence of the id parameter, we are going to search for a single record, or return all records.
Notice the == instead of ===.
This is because the id in the data is a number, where the id from the params is a string.
Based on the logic, we could add a query parameter to the endpoint that let’s us filter the data on the title property for example, but that is out of scope.
DELETE
As shown earlier, we are going to use a simple filter function to filter out the record with the given id. We start by retrieving the data from the flow context, and then filtering this data. Don’t forget to rewrite the new data to the flow context, so other components will get updated context data.
let data = flow.get('data');
if(msg.req.params && msg.req.params.id) {
    data = data.filter((item) => {
        return item.id != msg.req.params.id;
    });
    flow.set('data', data);
}
msg.payload = undefined;
return msg;
All together
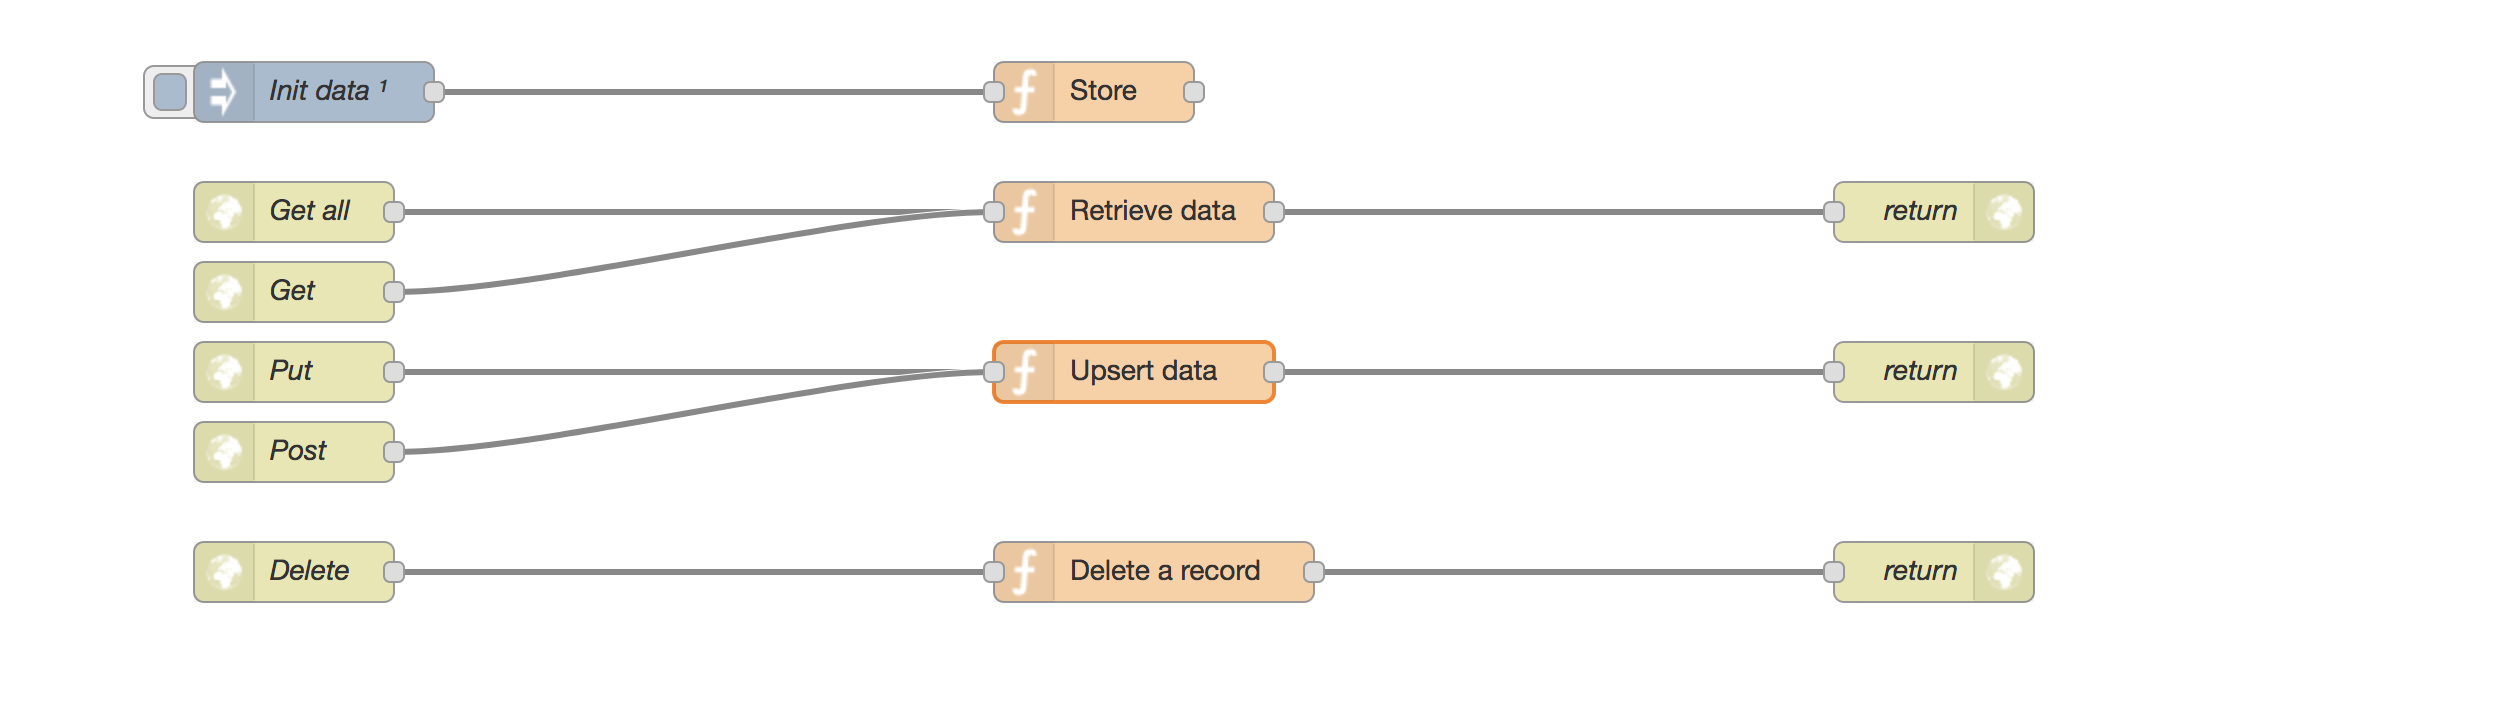
Now we should have an inject-input and 3 http-inputs (2 GET’s and 1 DELETE).
Our flow should look like:

Let’s deploy and test this setup.
First click the deploy button and wait a second.
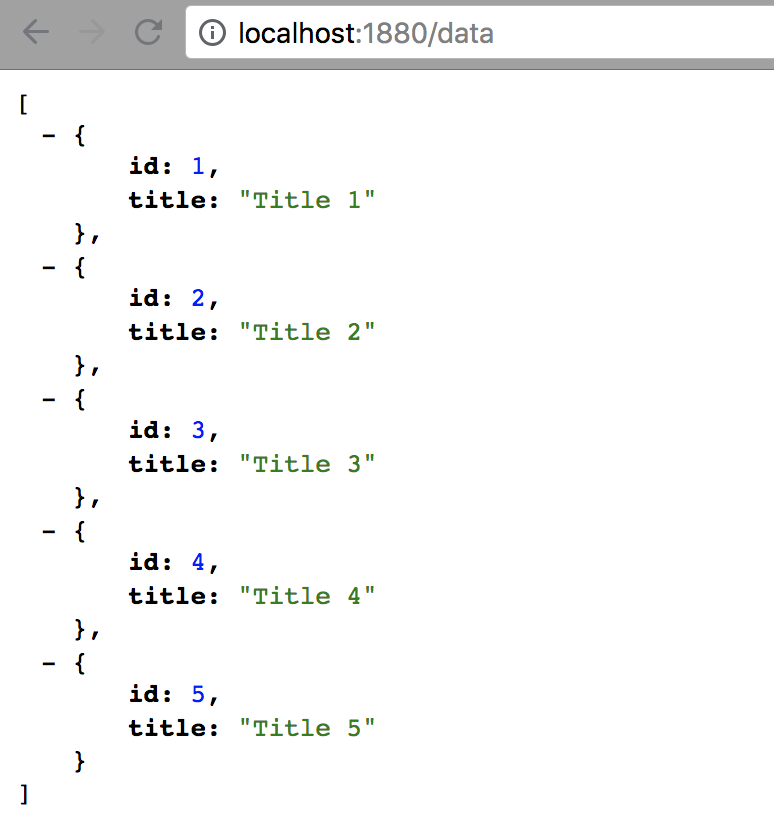
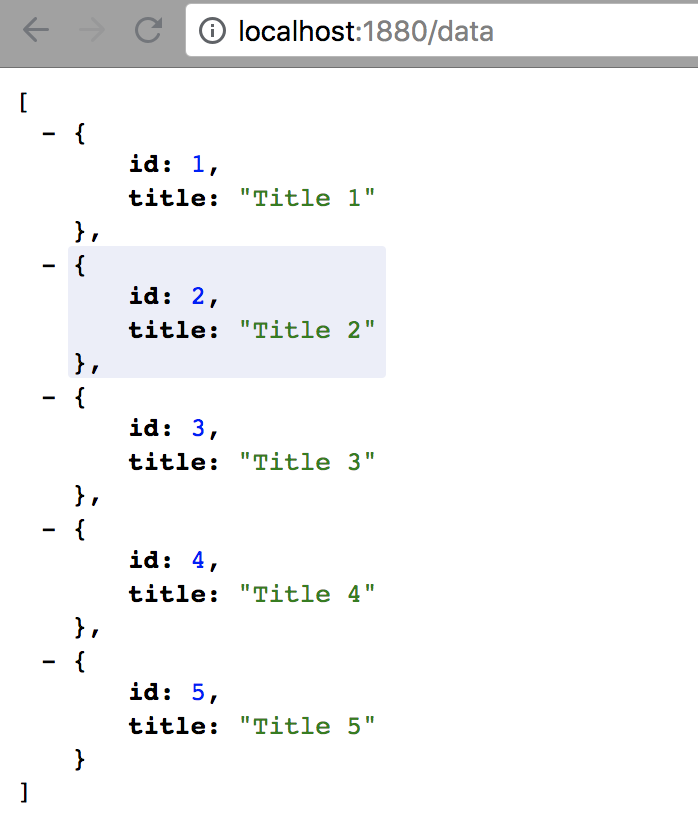
Then navigate with your browser to http://localhost:1880/data.
This should display your data in your browser.
Now, let’s try to delete a record.
$ curl -X DELETE http://localhost:1880/data/3
And refresh your browser:
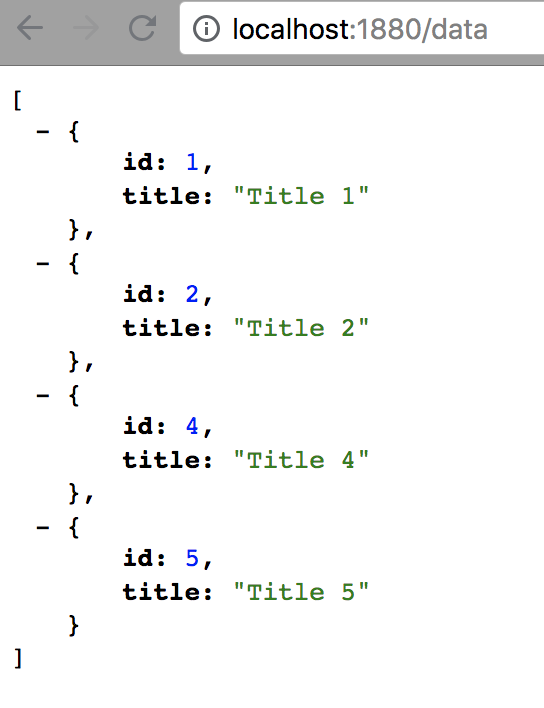
Seems like one big success! No?
Not exactly.
Try and delete records 1, 2, 4 and 5.
Now what?
Our data is gone and we don’t have a POST nor a PUT implemented.
Implementing a POST and a PUT is really straightforward.
POST and PUT
For the example, we are going to work with an upsert. POST and PUT will trigger the same function block that will be smart enough to update (if exists) or insert.
The upsert function-block can look like:
let data = flow.get('data');
let body = msg.payload;
body.id = Number(body.id); // quick fix making sure it's a number
let id = msg.req.params && msg.req.params.id || body.id;
let found = false;
for(let itx in data) {
    if(data[itx].id == id) {
        data[itx] = body;
        found = true;
        break;
    }
}
if(!found) {
    data.push(body);
}
msg.payload = body; // or adjusted body if needed
return msg;
So now we have a GET, POST, PUT and DELETE. But still, we are missing something. Assume we are developing delete functionality in the frontend while using this setup as a backend. Since we only have 5 records, I should inject new data to test after my 5 deletes. Or assume we are testing a frontend, connected to this mock backend. Wouldn’t it be nice that we can refresh the data to its initial state before running a new test suite?
The point I’m getting to is, we should come up with a way of refreshing our data to its initial state.
Resetting data
When you look at your flow chart, you’ll see there is something that looks like a button on the left side of our inject-input.
When you click it, you’ll notice a toast message appearing on the top of your user interface:

But what if we don’t have access to the user interface, or we don’t have control over it what so ever? For example, when running automated tests against this mock backend, somewhere on a dynamic Jenkins Docker slave? To overcome this, we are using an http-input to trigger the reset of our data.
Let’s take a look at our implementation:
The http-input is listening on /rest.
As you can see, we’ve added an http-response-output.
REST-calls are expecting a response! Don’t forget to deploy your new setup
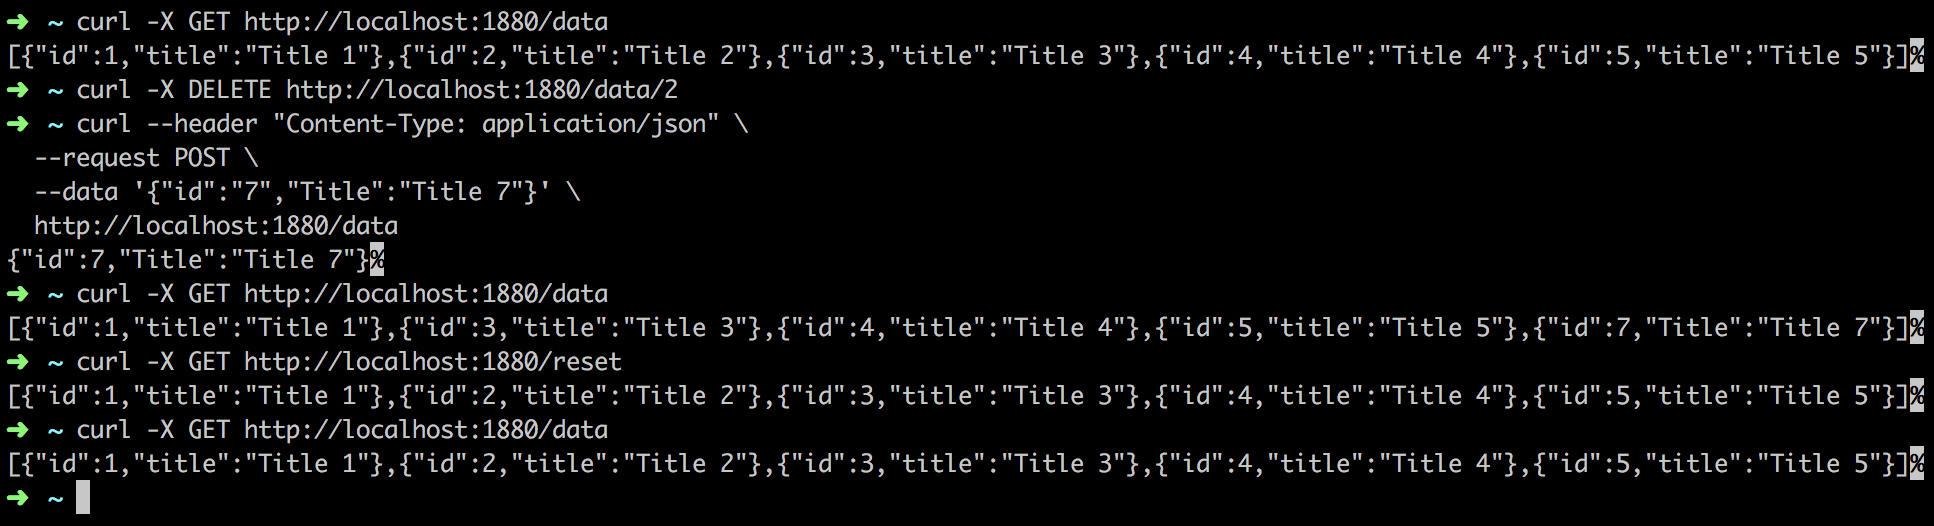
Making sure this works:
$ curl -X GET http://localhost:1880/data   // should respond with the initial data
$ curl -X DELETE http://localhost:1880/data/2   // should delete record with id 2
$ curl --header "Content-Type: application/json" \
  --request POST \
  --data '{"id":"7","Title":"Title 7"}' \
  http://localhost:1880/data   // should add record with id 7
$ curl -X GET http://localhost:1880/data   // should give the expected result
$ curl -X GET http://localhost:1880/reset  // should reset the data
$ curl -X GET http://localhost:1880/data   // should show the reset is working
JSON
The last refactoring we are going to do in this tutorial is switching from an hardcoded data json object to an external json-file.
As mentioned before, Node-RED provides ways of integrating storage and databases, but that is out of the scope of this post.
Still, we don’t want to include real data in this setup.
We should loosely couple our data provider and the backend mock implementation.
If some analysts, for example, provide us with new test data, we don’t want to change anything in this setup.
One way to overcome this, is to work with json-files.
Assume we have a json-file, called data.json with content:
[
  {"id": 1, "title": "Title 1"},
  {"id": 2, "title": "Title 2"},
  {"id": 3, "title": "Title 3"},
  {"id": 4, "title": "Title 4"},
  {"id": 5, "title": "Title 5"}
]
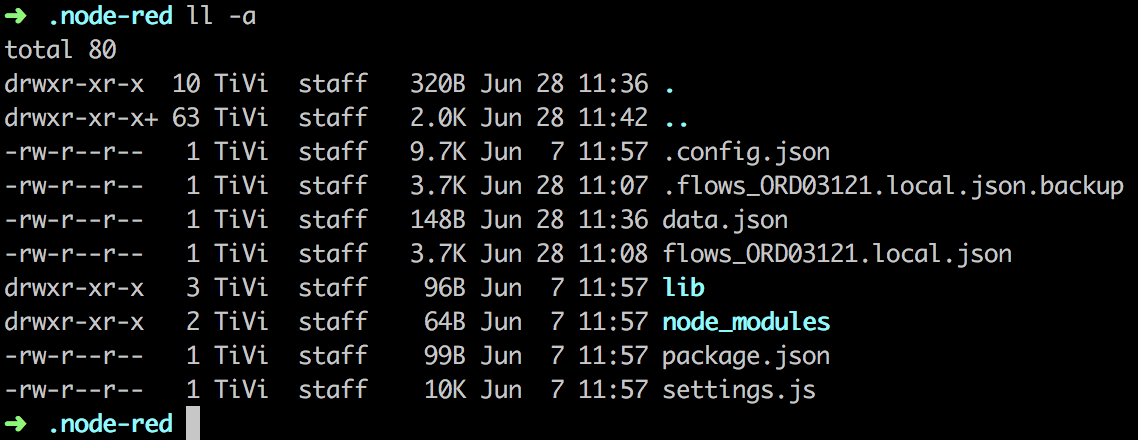
Remember when I mentioned some important lines in the console at startup?
One of those lines was referring to the User directory:
User directory : /Path/To/Your/Home/.node-red (which is the default)
Because we didn’t change anything in the settings.js file (or didn’t point to a custom one), Node-RED creates a context folder for the current instance.
Copy your data.json to this folder.
I will explain later why we are doing this.
Let’s read data from this json file instead of hardcoding the data:
Add a file component from the storage section
On the left of the user interface, there is a storage section with an input file option.
Drag this onto the flow chart.
Unlink the connections from the inject-input and the reset http-input with the ‘store’ function-block and connect both with the file-storage component.
Open the details and set the properties:
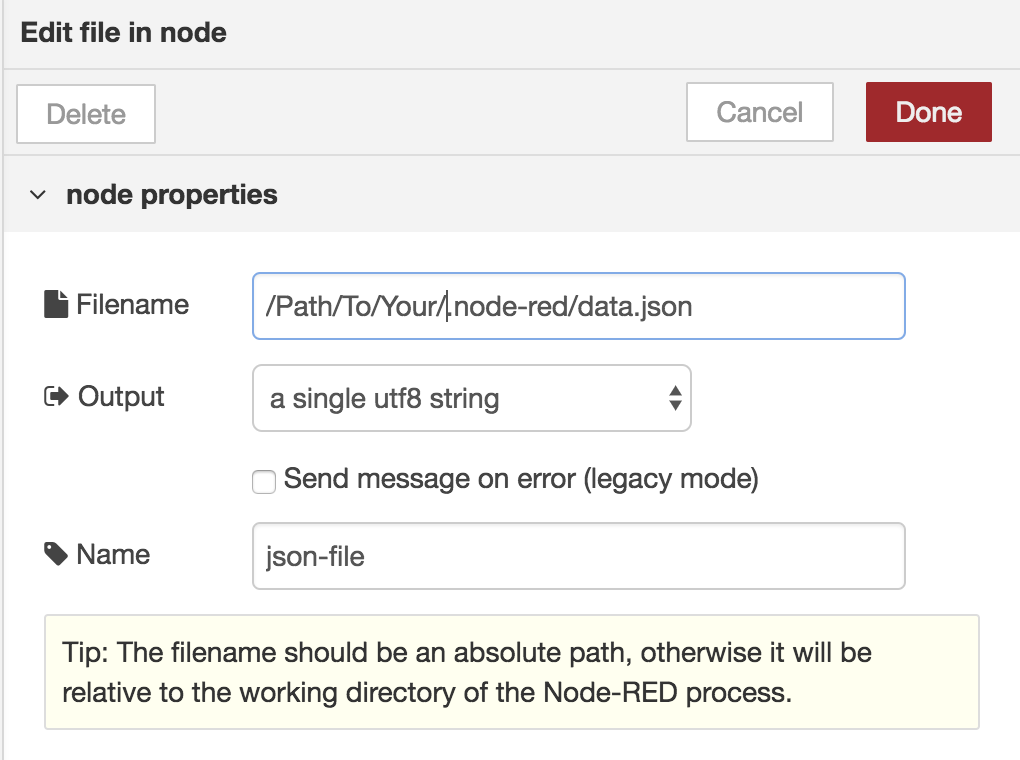
Do read the text on the bottom about the patch to the file! And keep in mind we have selected the ‘single UTF-8 string’ option.
Add a Json parse function
In the function section on the left, you have a JSON component. Depending on its input, it will parse or stringify a string or json object. Because we will be sending this component a ‘single UTF-8 string’, it will parse it to a JSON object.
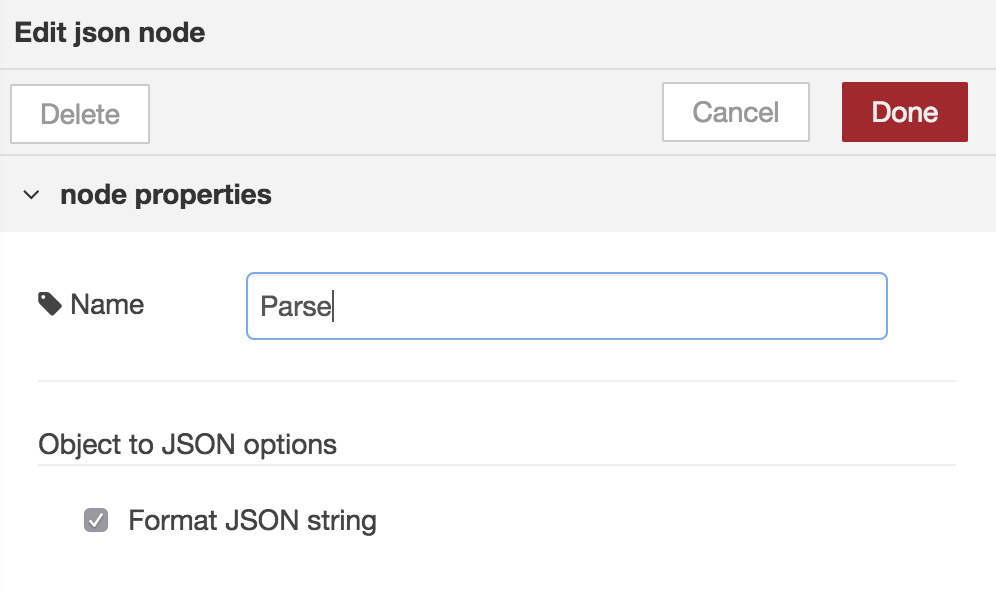
Integrate this component in between the file-storage component and the store function-block.
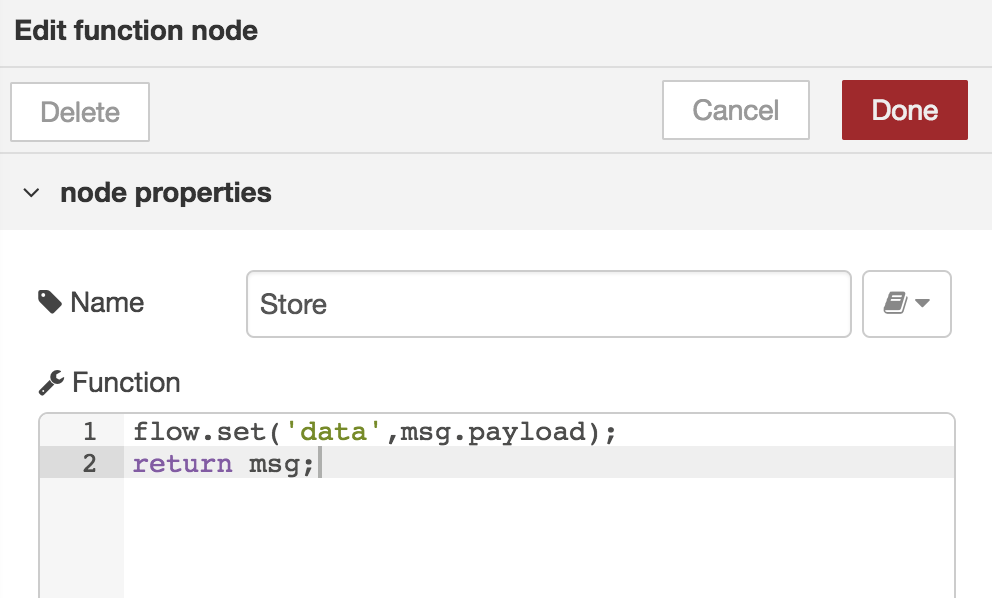
Refactor the store function
We are now ready to refactor the store function-block.
Remove the data and replace it with the content of the json-parse function.
Result [result]
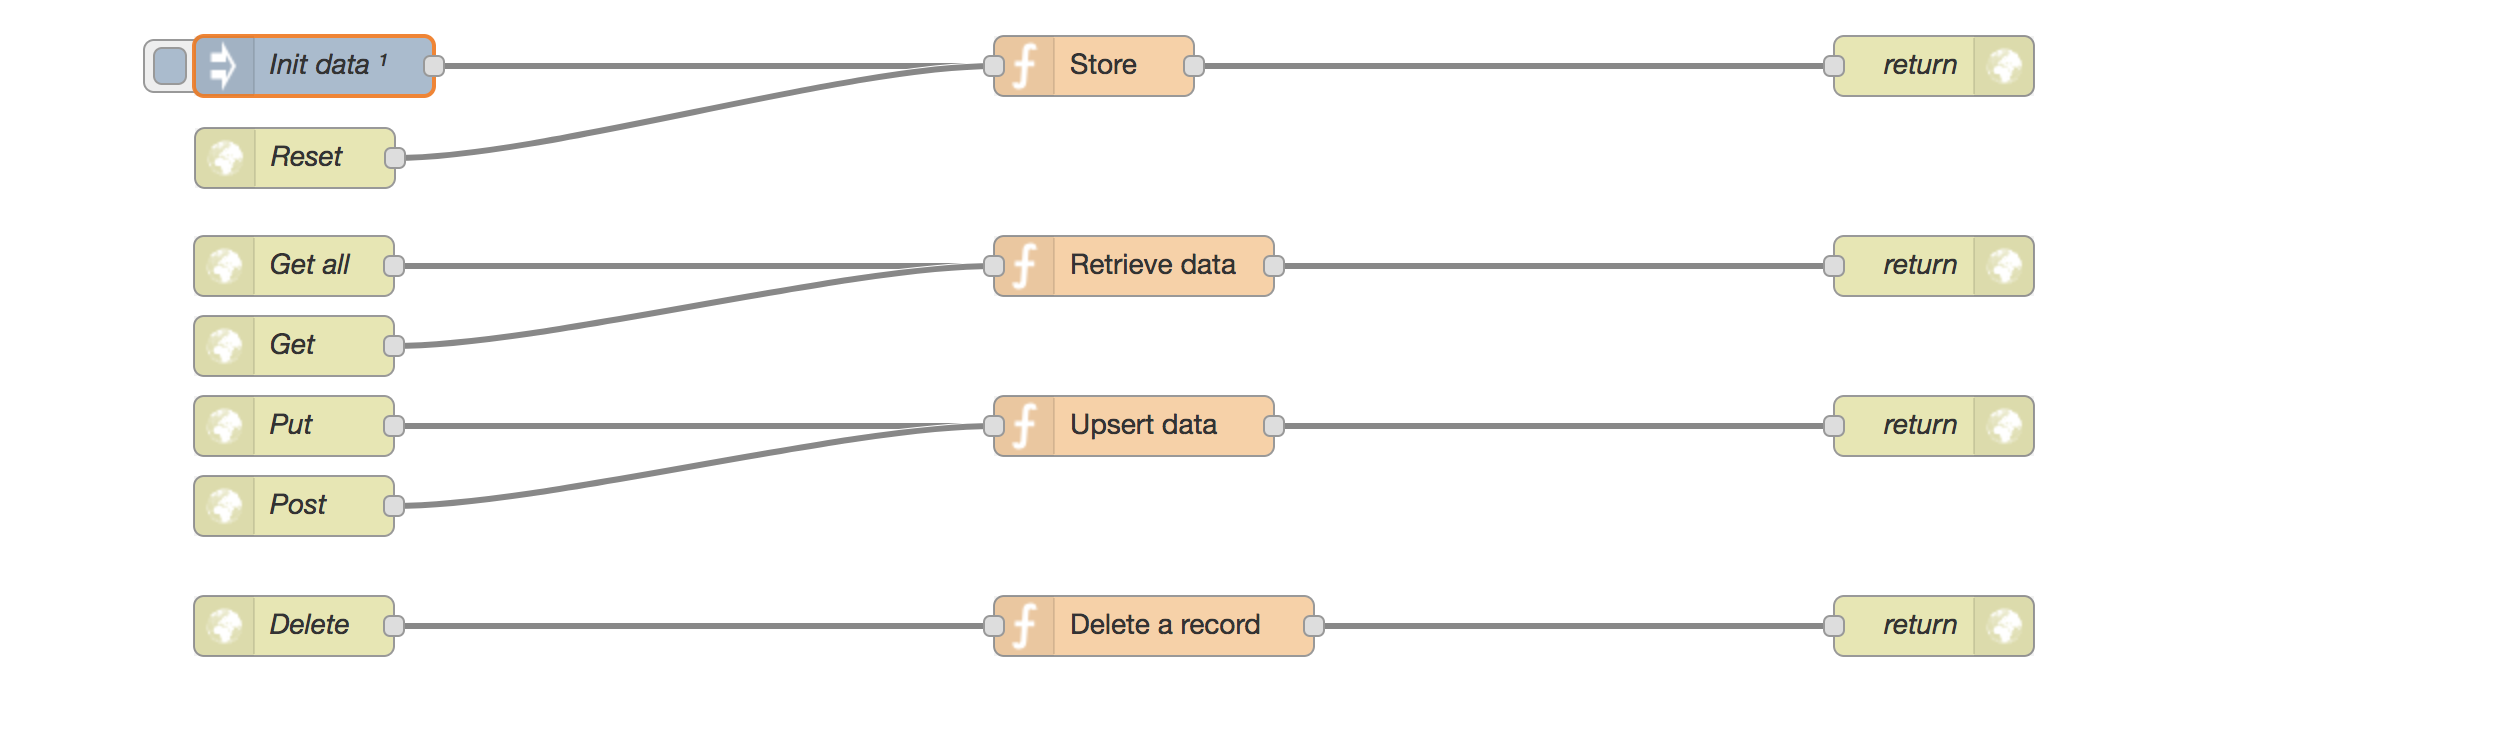
When finished, our setup should look like the following flow chart:
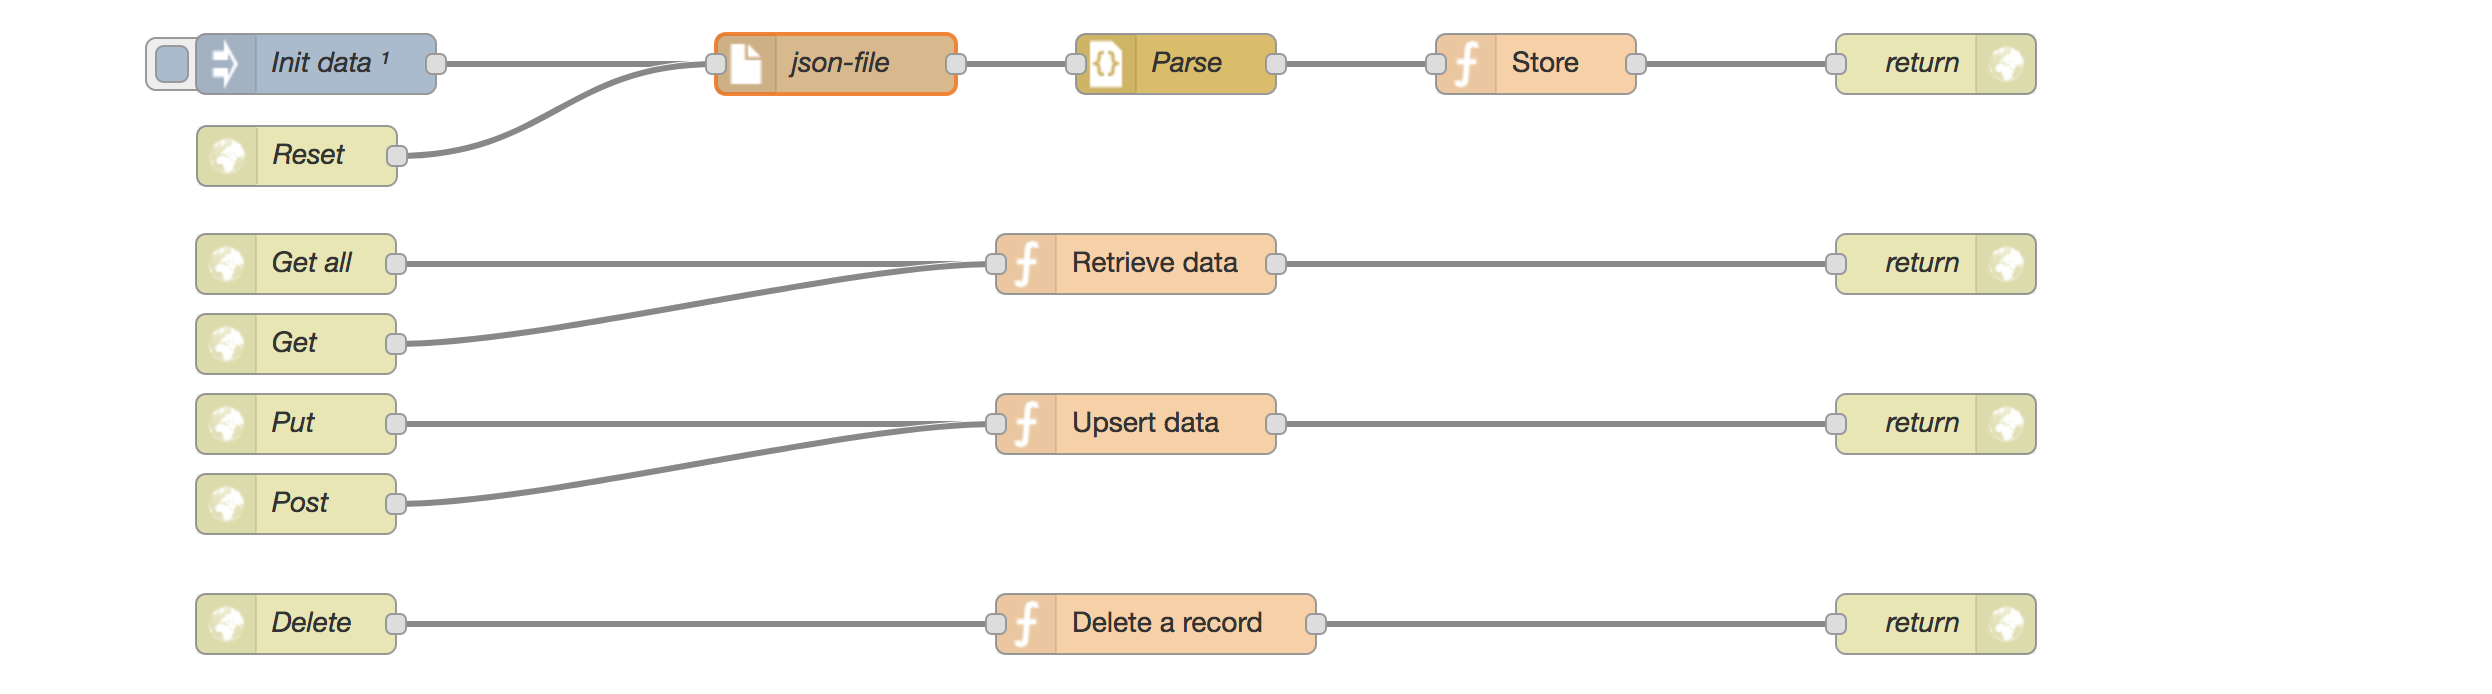
When the json-file gets updated, a data reset call will reload the new data into the flow context without needing to change the setup itself!
Node-RED persistent config
As mentioned before, Node-RED uses a user directory, a flow.json file and a settings.js file.
If those do not exist, it will create default ones for you in the default node-red path %USERPROFILE/.node-red.
Going through the settings file is also out of the scope of this post.
Advanced users can just read all about it in the docs or just open it and modify it.
Why I’m mentioning this directory, is because of the config persistence of Node-RED.
Go ahead and kill your Node-RED server (CTRL-C in terminal).
And now just restart it:
$ node-red
As you can see, Node-RED will just pick up its previous config because it’s available in the default directory. When more people need to work with this config, we need to share it. The easiest way to share this config, is to wrap it in a Git repository. Keep in mind that this may not be best practice to wrap the whole directory, but this way, your colleagues and continuous integration platform can just checkout the repository and run the server, including the data files.
When running $ node-red --help it shows the command line params.
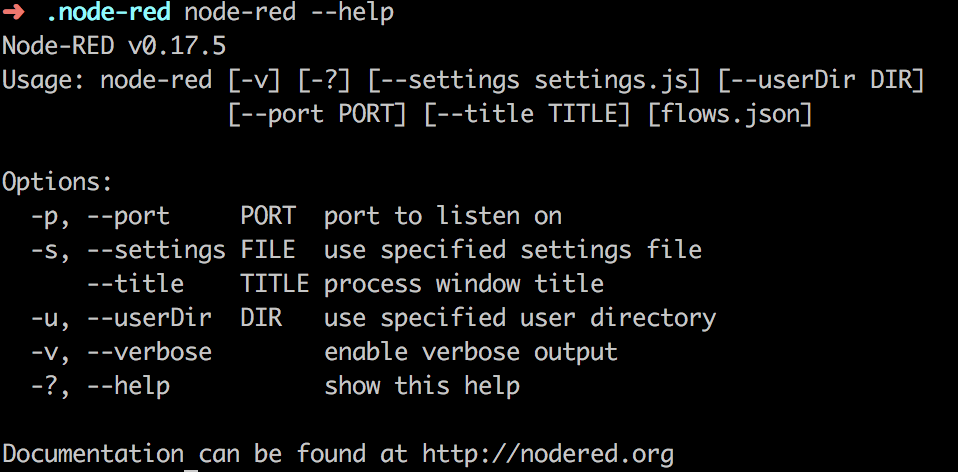
Look at the -s and -u option.
Node-RED provides us with cli parameters to run custom configs.
Let’s assume we clone our newly created Git repository in ~/repositories/node-red.
$ node-red -s ~/repositories/node-red/settings.js -u ~/repositories/node-red
Node-RED and Docker
Node-RED also provides a Docker image at Docker Hub. This way you do not even need a Node.js environment preinstalled.
You can just run it with:
$ docker run -it -p 1880:1880 --name mynodered nodered/node-red-docker
What about our persistent config?
Node-RED is started using NPM start from this /usr/src/node-red, with the –userDir parameter pointing to the
/datadirectory on the container. The flows configuration file is set using an environment parameter (FLOWS), which defaults to ‘flows.json’. This can be changed at runtime using the following command-line flag. – from docs https://hub.docker.com/r/nodered/node-red-docker/
$ docker run -it -p 1880:1880 -e FLOWS=my_flows.json nodered/node-red-docker
So we can choose only to provide the flows.json file or we could map our user directory from our repository as a volume to the /data in the container, providing the container our context.
An other option is to bake your userDir into your image.
This way you can provide your CI with a ready to go Docker image for this particular case.
This is probably not the best solution, but in some cases it can be very helpful.
Node-RED and CI
As we now know how we can configure, dockerize and run our mock backend, we could easily include it in one of our testing stages during our Continuous Delivery pipelines setup. For those of you whom read the article about the different stages of API testing (here), the following setup will need no further explanation.

In this setup, the task at hand is running the automated tests defined in and run by our Gauge, Protractor or Nightwatch.js framework. To be able to do this, it would be nice to launch an environment at once. We can provide our Continuous Integration environment with a compose file that will launch and destroy our frontend and Node-RED mock backend in one environment.
Conclusion
It’s nice to have an external tool available that can get reused for multiple purposes, in our case development and testing. Node-RED provides us with cool features and an easy to use User Interface to do so!


